How to Build a Swing In Your House
Bring the Indoors Inside this Winter
Purchased this epic swing from a great closeout store deal but had no tree to hang it from. The rain came, then cold, then the snow and now winter. One joy I have is seeing smiles and hearing laughter from my children. This swing has done just that!
More...
Solution Found as to Where to Put the Swing
The swing is now indoors and has added an entire new addition to our reading nook. Through some simple steps here I'll show how you to can hang a swing safely indoors.
We chose this swing because we wanted it to simply go forward and back to save space and load as many children on as possible.
Materials: (Links to Amazon which we are affiliates)
If you are going to purchase any of these items please use the links as a thank you to us
as we choose not to advertise on our site. The prices are all the same.
1- Swing (great as comes with tree hangers as well so can take outside)
1- Stud Finder (best one I love and use in my home repair bus. I double check with magnet as well)
1 Pair of Swing Hangers (maybe could use eye bolts but I knew my swing needed to hold much weight and stress) The swing comes with locking carabiners so don't worry that this doesn't.
Note: if you want Swing Hangers that have lag bolts and drill bit order this set and save a trip to the store. Otherwise cheaper to purchase lag bolts seperately at store.
Painters Tape and Pencil
2 Screws 3 1/2" long
4 lag bolts if didn't come with any 3" x 3/8" long (or carriage bolts with washers, lock washers and nuts) Note carriage bolts will never come out and must use 2x4)
4 Washers to fit through lag 3/8" bolts
4 Locking washers to fit through 3/8" lag bolts
1 36" 2x4 if you have my same issue otherwise not needed (mine was 33" in then end)
4 Self-Tapping structural wood screw at least 3 3/4" long (supper nice)
Tape Measure
Pencil
Drill and bit for screws and 1/4" drill bit for lag screws to drill through 2x4 so you don't crack it
Saw (hand or electrical to cut 2x4)
Ratchet or wrench (ratchet is just faster for lag bolt)
Swing Hangers
Step 1: Determine a Location for the Swing
Take your swing and lay it down where you would like it. Determine that when it swings fully to the ceiling it will not hit anything else. Yes, the first thing your children will do and yourself : ) will see how high. Even our two year old couldn't resist the urge to fly high.
Take out your tape measure. Measure from the floor to ceiling and then lay it on ground one end at where swing will be and then you will see roughly the swings path.
Step 2: Locate the Ceiling Joist
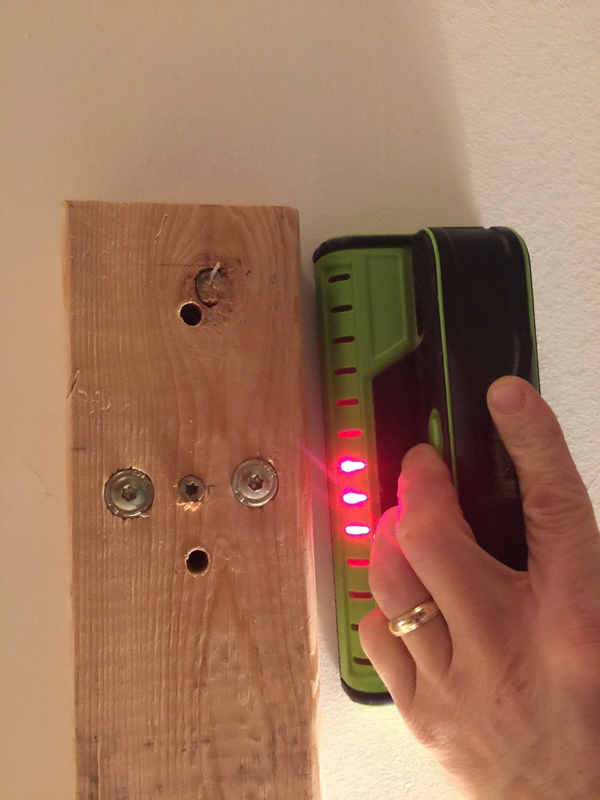
Locate the Ceiling joist with a stud finder. Very simple if you use one like the one I recommend. I as well use a magnet to make sure. Use small pieces of painters tape to mark ceiling joists.
Step 3: Decide if need 2x4
Once you have located your ceiling joists and what direction you want the swing to go you will know if you need a 2x4. If your swing will sing in the same direction as the ceiling joists then you need a 2x4.
If your swing will swing opposite or perpendicular to the ceiling joists then you will not need the wood and therefore skip to step 8
Step 4: Measure distance from one side of swing to the other
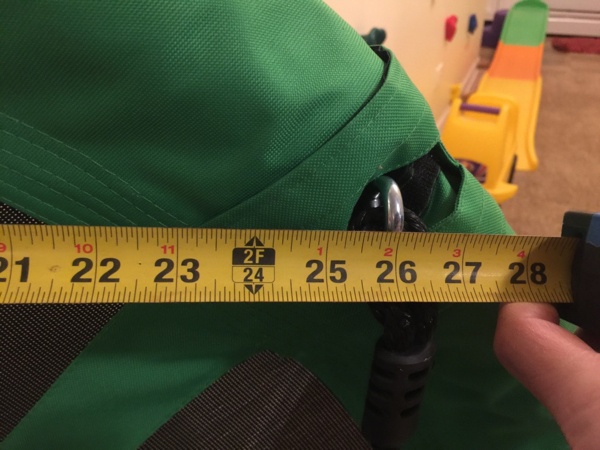
Lay the swing down and measure from one side of where rope attaches to swing to opposite side of where rope attaches. Note: Be sure not to measure on the same side (meaning only measuring on the left side.) You must measure from the left side to the right side.
Step 5: Layout design on 2x4
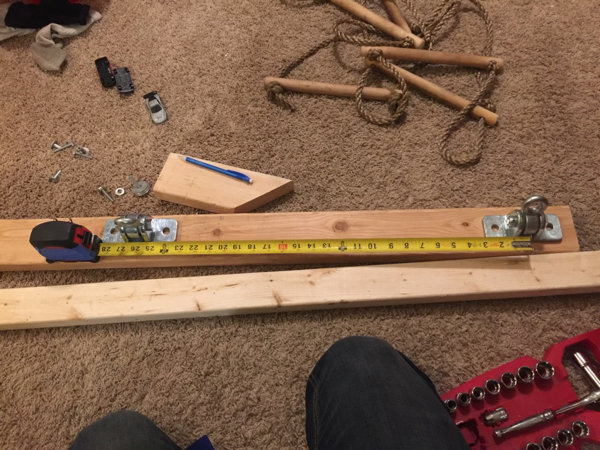
Lay 2x4 flat on ground and place swing hanger on top of 2x4. Place one hanger 1inch or more from end. I did one inch but you can do as much as you would like. Next with the one hanger on the wood make a mark on the wood at the center where the center swing hanger is. I cut mine 33" long. See photo.
Now measure from that mark on wood the distance you came up with in step 4. Thus put the second swing hanger centered on that mark. Next measure one inch or more from the outside of the hanger away from the other hanger (same distance you did at beginning of this step). Make a mark and then this is where you will cut the 2x4.
Step 6: Cut 2x4 and Swing Hanger layout
Cut the 2x4 at the line you made at the end of step 5. Next lay 2x4 on the ground and place swing hangers on top. The swing hangers should be the same distance from each end of the 2x4 and I centered them as well in the middle of the 2x4. Next take a pencil and mark the holes where the swing hangers will go.
Step 7: Pre-drill where the Swing Hangers will go
Pre-drill 1/4" holes if bolt is 3/8" for the swing hangers. Why? So that when you screw on the swing hangers they don't crack the 2x4. Remember don't pre-drill holes larger that the lag bolt. Pre-drill less than the size of the lag bolt.
If using carriage bolts you will have to install bracket completely now.
Step 8: Attach 2x4 to Ceiling
Hold 2x4 to ceiling where you would like the swing so that at least two ceiling joists go through the 2x4. Next use painters tape to outline where you would like the 2x4. Basically marking ends and one side. Now stand back and look at tape marks and solidify that is where you want the swing or now is the time to move it, as you haven't done anything to the ceiling yet.
Once for sure on location of 2x4 mark on the 2x4 where the studs will go through it. Now pre-drill three holes where 2x4 will go into ceiling joist.
On the ground: screw one 3 1/2" screw in middle hole (only far enough so doesn't poke through wood) on one side and other 3 1/2" screw in middle of three holes at other end.
Next hold wood to ceiling and screw both screws all the way through and into the ceiling joists.
Next screw in 3 3/4" self taping wood lag screws in remaining 4 holes.
Note: when screwing wood to ceiling you will most likely see nail pops as the drywall probably has sank some so when you screw the wood to ceiling it will push up the drywall. You can try to prevent this by not tightening all the way but if like me I wanted it tigther than any "looseness."
Step 9: Install Swing Hangers
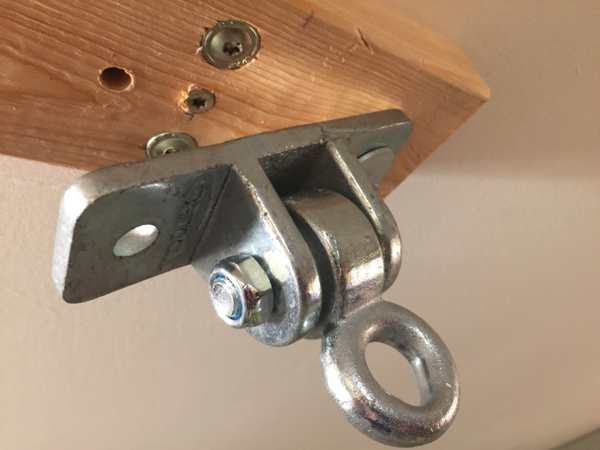
If you have used a 2x4 you will already have the holes ready for the lag bolts and at that take a ratchet and put a lock washer on then a regular washer on and tighten one at a time.
If you are installing swing hangers directly to ceiling then go to step 4 and 5 and do those same steps but on the ceiling after completing those come back to this step and attach swing hangers. Note: I suggest using painters tape on the ceiling to mark the swing bracket locations so you don't mark up ceiling in-case you end up moving the hangers before installing.
Step 10: Install Swing
Almost there! Install one carabiner to each Swing Hanger and install swing rope to carabiner.
Step 11: Test and Enjoy!
Get on it yourself and swing! Try it out just like your children will. The one thing we had to do was take a little cooking oil and spray into Swing Hanger hinges so they didn't squeak. I prefer cooking oil than WD-40 in my house. Just be careful when you spray not to over spray your ceiling.
Wow we love this! The fun part was I finished it while the children were sleeping and we woke up hearing the swing and much laughter.
You Can Do This! Your children...and you will love it!
Let us know any comments or questions.
Please note you are fully responsible and liable for building this and you take responsibility. This article is not intended to be any guarantee of any issues that may result from building this or playing on it.
Note: We are a participant in the Amazon Services LLC Associates Program, an affiliate advertising program designed to provide a means for us to earn fees by linking to Amazon.com and affiliated sites. There is no extra cost to you and this would help us out as we choose to limit the advertisements on our website to make our website more enjoyable to you!


